Food & Drink
Grow Microgreens at Home

A Beginner's Guide to Growing this Delicious Superfood at Home
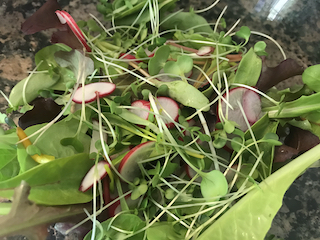
Microgreens are a popular garnish in many upscale food scenes, and they tend to be pretty expensive when you buy them at farmers’ markets and grocery stores.
If you’ve been interested in trying microgreens but didn’t want to spend a ton of money on them, you’re in luck! They are very easy to grow at home, and the seed mixes don’t cost a fortune. Plus, it’s always gratifying to grow something, especially something that is nutrient-rich and delicious!
What exactly are microgreens?
Microgreens are the edible, immature sprouts of a plants. These initial leafy structures that seed-bearing plants produce are called cotyledons, and they are packed with vitamins and minerals.
Which seeds work best for microgreens?
Varieties of the following: any salad greens, kale, broccoli, radish, beet, cabbage, many herbs, even some grains and flowers make excellent microgreens. Each will have a different flavor and nutrient profile.

What kinds of nutrients are found in microgreens?
According to scientific studies, microgreens are incredibly nutrient-dense for their size/weight, in some cases 40 times higher than their fully-grown counterparts. Some of the vitamins and minerals in them include zinc, iron, potassium, calcium, vitamin C, lutein, beta-carotene, and more.
What do you need to get started growing at home?
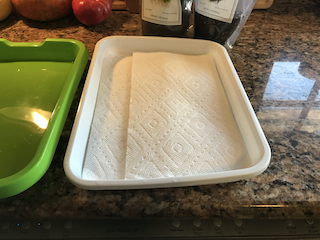
1) Any shallow plate or tray and something to cover the tray with while the seeds germinate.
You can see below that I’m using special trays made for growing microgreens. These are not absolutely necessary, but the mesh tray makes monitoring water levels a little easier through the process. A simple pie plate or anything similar would do.
2) Some soil (enough to cover the bottom of the tray) or paper towels for substrate to give the roots something to anchor into.
3) Microgreen seeds
Usually sold in bulk, rather than the prices you pay for seed packets for a vegetable garden. There are many suppliers online.
4) Water and a mister if you have one, again not necessary but helpful
Step-by-Step
Step 1
Line the tray with paper towels or soil
Step 2
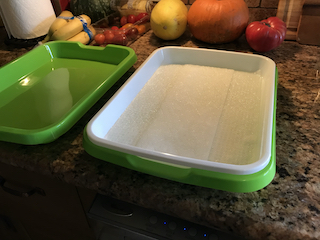
Wet the paper towels or soil, enough to soak but not standing water
Step 3
If using a mesh top tray, place the mesh tray in one of the solid trays to catch the water.
Step 4
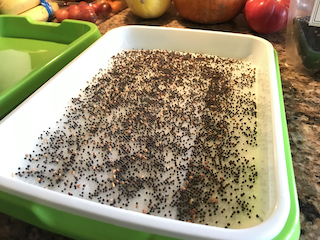
Sprinkle seeds across the paper towels. The density will be up to you, and you can experiment with how dense to spread them as you get a feel for the process.
Step 5
Cover the seeds to mimic being buried under the soil while germinating. If using soil don’t cover them with soil. Just spread the seeds over the soil and cover with something that’s easy to lift off later.
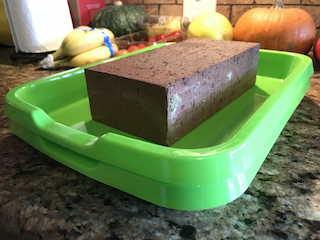
Step 6
Weigh down the cover with something heavy. I used a brick, but a stack of books would work too.
Step 7
Lift the tray and mist the seeds with water once a day to keep the seeds moist.
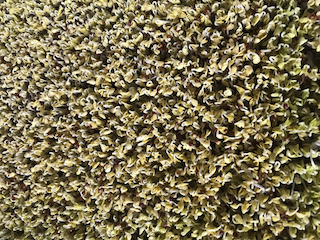
Step 8
Wait two or three days until the seeds have started sprouting and pushing the weight up. The sprouts will look something like this:
Step 9
Remove the cover and place the sprouts near a window or full-spectrum light.
Step 10
Every day or two, check to make sure there’s a little standing water in the bottom tray. If the water has evaporated, add more.
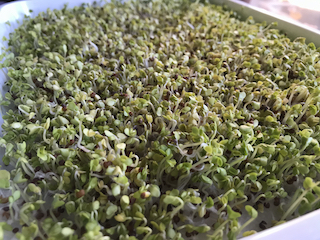
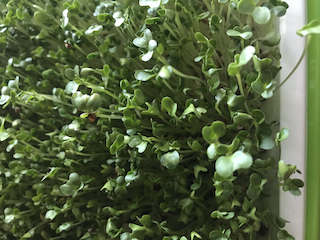
Step 11
The best step! After about a 7-10 days, the microgreens are ready!
Suggestions for use and storage
Trim them as you want to use them with clean scissors or a sharp knife, leaving the root end attached to the paper towel/soil.
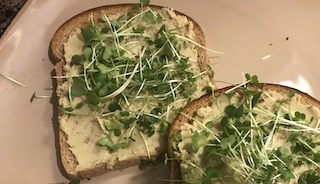
Sprinkle them over toast, salad, or soup as a garnish or throw them into the blender with your regular smoothie ingredients.
You could also trim them all at once and store them in a dry, airtight container in the refrigerator. They stay fresh for several days, but they may not last that long once you realize you can put them on almost anything! This method also avoids the chance of mold and germs developing in the growing tray, and you can start another batch to sprout right away!

If you’ve left them in the growing tray, once you’re finished trimming them, you can just roll up the root-covered paper towel or soil and throw it in your compost if you do that at home.
Be sure to thoroughly clean the growing trays before you start another batch. Mold and germs will develop over time if you don’t always start with clean trays.
Have fun microgreen-ing!
by KaDee Bramlett
published 01/05/2021
This is an ad-free space. If you'd like to contribute to help me continue creating this content, I accept contributions on Venmo @KaDee-Bramlett. Thank you!