Food & Drink
Roasting Coffee at Home is Easy!
A brief video of the progression of coffee beans roasting
A Beginner's Guide to DIY Coffee Roasting
It doesn’t take a fortune or a ton of knowledge to begin roasting coffee at home. All it takes is a few pieces of affordable equipment, some green coffee beans, and some intense heat! If you love coffee and want to give this a shot, you’ll soon find that it’s relatively easy to do, often less expensive than roasted coffee from the store, and usually tastes way more complex, interesting, and fresh!
Here’s a step-by-step guide with links to resources included
Step 1
Acquire green coffee beans. Where? I’ve been purchasing green beans from Sweet Maria’s and Copan Trade. Sweet Maria’s has tons of info about additional roasting equipment and methods for getting the perfect roast and perfect brew.
What variety should you buy? If you already know a region of beans you like, go with that. If you have no idea, just pick something! You gotta start somewhere!
Step 2
Get a cast-iron dutch oven or skillet. I prefer the dutch oven since the sides are higher, making it less likely that beans will fall out while roasting.
Step 3
Get a whisk. You must keep the beans moving throughout the roasting process.
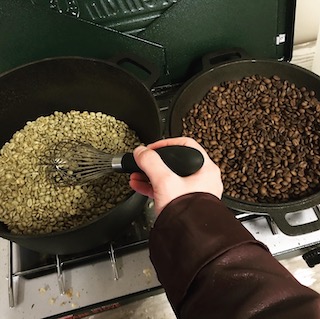
Coffee beans before and after roasting
Step 4
Heat the dutch oven or skillet on high heat for 5 minutes or so. There’s no point in putting coffee beans in a cold pot. A gas stove is best since it gets hot fast and stays hot, but I’ve heard that electric stoves work too. It would just take longer to heat up.
Also, be sure your area is well-ventilated. Some research shows that the smoke produced in the roasting process can cause adverse effects on the respiratory system, but really…when is it ever totally safe and healthy to inhale smoke….? Be safe and use common sense.
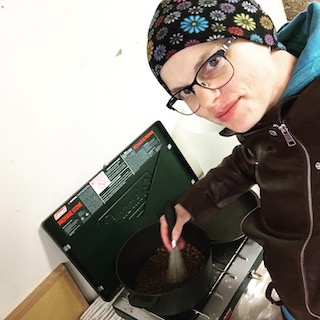
Here I am, roasting coffee!
Step 5
Add the beans. How much? Enough to cover the bottom of the pot/skillet. You can experiment with the amount as you get a better feel for it.
Step 6
Immediately begin stirring the beans around. Don’t let them sit too long at any given time because they’ll scorch.
Step 7
Keep the beans moving while you listen for First Crack. The beans will start smoking as they darken in color, and they should be developing a deep, sweet roasty fragrance. Once the cracking starts, it sounds a bit like popcorn popping but with a sharper, higher-pitched sound. At this point you’ll also notice the papery skin, known as chaff, beginning to separate from the beans. This material will ignite very easily, but doesn’t usually cause a problem. Just keep an eye on everything.
A brief video of the progression of coffee beans roasting
Step 8
Keep the beans moving until the cracking sounds slow down or stop. This is known as a City Roast.
If you do continue past First Crack, you’ll find there’s a quieter interval before the beans begin cracking again. The second wave of cracking is called Second Crack. It sounds a little fainter in volume and the cracking sounds are much more rapid. Once Second Crack starts, you’re into dark roast territory. This is where the coffee can burn in the blink of an eye. Darker roasts like this have more of a “roasty” flavor, which is less complex after its lost the fruity, nutty, and chocolatey characteristics you’ll find in lighter roasts. Basically, there’s no right or wrong. All of this is based on your taste preferences. With more practice, you’ll learn what you like and become more sensitive to the changing characteristics of the coffee while it roasts.
Step 9
After you take the beans off the heat, quickly transfer them onto a cookie sheet, into a metal mesh sieve, or another pot or bowl (not plastic because it will melt while the beans are still hot). The sooner the beans cool, the quicker the roasting process stops.
Step 10
You could grind and brew the beans at this point to try your roast, but it will taste even better if you can manage to wait a day or two while the flavors finish developing. The coffee will be at its best for a week or two. Beyond that it’ll get a little stale but still be drinkable…and honestly better than almost anything you’ll find at the grocery store.
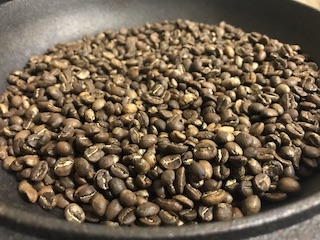
Roasted coffee beans
Final Thoughts and Take-Aways
Want more info? Sweet Maria’s has lots of resources to help you learn more, and there are lots of YouTube videos and home roaster groups on social media.
Stay safe through this process. Never leave your roasting beans unattended and always roast in a well-ventilated area with windows open, fans on, and wear a mask if you’re concerned about the adverse health effects of the smoke produced during the roasting process.
Enjoy your home roasted coffee!
by KaDee Bramlett
published 01/02/2021
updated 02/22/2021 to add more photos
This is an ad-free space. If you'd like to contribute to help me continue creating this content, I accept contributions on Venmo @KaDee-Bramlett. Thank you!